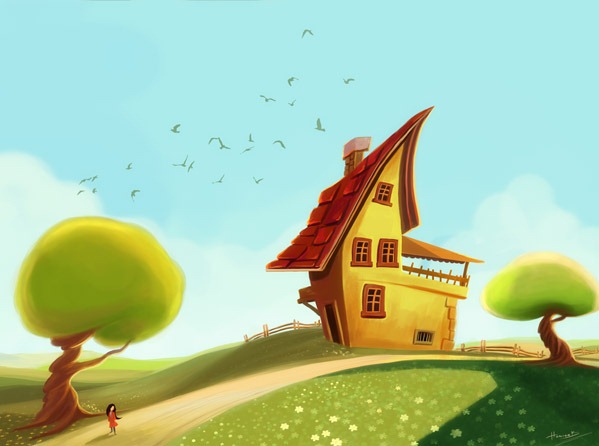
 With this tutorial, I am going to explain the process of painting which I have called, "The Imaginary House". I will go into detail and show my working process and what tools I prefer to use. When you finish this tutorial, you'll gain a comprehensive understanding of how to develop a concept sketch.
Preview of Final Results

“The Imaginary House” Painting Photoshop Tutorial
Step 1
First of all, Let's open a new document (approximately 700wide and 826 high, around 72 dpi) and make a preliminary sketch. (Ctrl+N or File > New). For now it is in 72dpi, but after changing the resolution to 300dpi (without re-sampling image) you can able to print it on A3 format in pretty good quality
- Width: 1000px
- Height: 592px
- Resolution: 72.
- Color Mode: RGB Color; 8 bit
- Background Contents: White

Step 2
The hardest part with any environment or character illustration is coming up with the idea. I started sketching some ideas and quickly come up with this environment scene. Depending on the complexity of the task I am doing, I'll make a number of different sketches. Now, here is the main sketch work which I draw.

Step 3
After finishing the the sketch, I set the sketch layer to "multiply. To open the Layers Palette if it isn't already on your screen, press the F7 key at the top of your keyboard. Or you can open from Window/Layers

Step 4
Now to create a new layer, press Shift+Ctrl+N (Win) / Shift+Command+N (Mac). This will pop-up Photoshop's New Layer dialog box where you can name the layer, as well as set some other options. I name the new layer as as "main color" 
Step 5
Open a new layer and make a selection with a Rectangular Marquee Tool (M) and after selecting the canvas choose the Paint Bucket Tool (G) fill the new layer with this new color. Now I must deselect the selected area. For this click on the Select and choose Deselect (Ctrl+D) option.

Step 6
The second step is here you to choose the main colors for you scene. And here are my colors for this illustration. As always I want to do something really colorful painting. I decided for background some blue colors and a little yellow . Other colors are for the environment. Open another file and save your colors. And always keep open that new file when you are painting.

Step 7
While worked on the colors, I tried to figure out the main light first. Where the light came from? What color is it?. There is a yellow light at the background and there is another color on the front.....Now that the general details are almost fixed.

Step 8
Here I have 3 layers, one is main color another is sketch and the other is background. Now here I have closed the "main color" layer. And here see the at the background colors. Now I am giving you the main sketch so you can see the layers.

Step 9
Now I am going to show you how to merge two layers. Firstly change main color layer setting to Multiply. And then click on the right on the mouse or with main color layer selected, go up to the Layer menu at the top of the screen and choose Merge Layers down near the bottom of the list. Or for a faster way, press the keyboard shortcut Ctrl+E (Win) / Command+E (Mac). Here we leave the sketch layer. You don't need to merge the sketch layer.

Step 10
Here, two layer is merged down and now we can continue to coloring process. You must do the same on your own project. We have now only two layers. And at this step I would like to change the size of my file because I'll begin to add more details so I'll need a bigger file size. So open Image/Image Size and make the settings as you see 2000x3072 and 300.

Step 11
Here now we can began to open new layers for each main objects in the canvas. Here is a new layer for the house. And also I have closed the other layer. As you see it was just a try for to see the main idea and the main colors. Here we did see the image as a whole in this step. On the next steps I'm going to create some more layers. The reason for painting on such new layers because of you need to make corrections later in the painting. It is much easier to fix errors if the main elements of your painting are separate entities. This step is really really very important.


0 komentar:
Posting Komentar