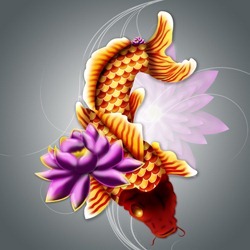
 Learn how to create a beautiful Koi Fish and flower design with Adobe Illustrator and Adobe Photoshop. This tutorial will show you the basics of creating shapes and how to shade using tools and gradients.
Preview of Final Results
![final-results[14] final-results[14]](http://photoshoptutorials.ws/images/stories/b6c33ab10576_146E1/final-results14.png)
Download the PSD
Koi Fish.zip | 6.18
Download from FileSonic
Download from Website
Koi Fish Photoshop Tutorial
Resources
- Fish Scale Patterns - Brusheezy
- Swirl & Flower Brushes - Deviant Art
Step 1 Create a New Document
In Photoshop create a New Document (File>New) My canvas is 500px x 500px but you can make it any size to suit your needs.
![step-001[12] step-001[12]](http://photoshoptutorials.ws/images/stories/b6c33ab10576_146E1/step-00112.png)
Step 2 Flower
First we will create one of the flowers. Start by adding a Gradient Overlay to the first layer (name it 'Background')
![step-002[12] step-002[12]](http://photoshoptutorials.ws/images/stories/b6c33ab10576_146E1/step-00212.png)
![step-002a[12] step-002a[12]](http://photoshoptutorials.ws/images/stories/b6c33ab10576_146E1/step-002a12.png)
Step 3 Petal Shapes
Create a New layer and name it 'Petal 1' make an outline of a petal like the image below using your Pen Tool.
![step-003[12] step-003[12]](http://photoshoptutorials.ws/images/stories/b6c33ab10576_146E1/step-00312.png)
Step 4 Fill the Petal
Right click the outline of your petal and then>Make Selection or on your Paths tab right click then>Make Selection. Fill this petal with a purple color.
![step-004[12] step-004[12]](http://photoshoptutorials.ws/images/stories/b6c33ab10576_146E1/step-00412.png)
Step 5 Add Contrast
On this same layer grab your burn tool (61 px soft brush, shadows, 100%) make your petal look like the image below. I used a combination of Ranges: Shadows, Highlights and Midtones to achieve this look.
![step-005[12] step-005[12]](http://photoshoptutorials.ws/images/stories/b6c33ab10576_146E1/step-00512.png)
Step 6 Petal Highlight
Create a New layer above this one and name it 'Petal 1 Highlight'. Grab a 42px soft brush #E5BA2A, with a Flow: 73%. Erase any areas that goes outside of the petal.
![step-006[12] step-006[12]](http://photoshoptutorials.ws/images/stories/b6c33ab10576_146E1/step-00612.png)
Step 7
The third thing that we will add to this petal is a darker shadow. First make a new layer above your 'Petal 1 highlight' then make a selection of your 'Petal 1' layer. Once you have done this contract it. Select>Modify>Contract by 5px like the image below.
![step-007[12] step-007[12]](http://photoshoptutorials.ws/images/stories/b6c33ab10576_146E1/step-00712.png)
Paint in this area with a soft brush using #2c0024 Note: Name this layer 'Petal 1 shadow'
![step-007a[12] step-007a[12]](http://photoshoptutorials.ws/images/stories/b6c33ab10576_146E1/step-007a12.png)
Step 8 Repeat Petals
Repeat these steps to create the rest of your petals. I have provided images of how the process looks.
![step-008[12] step-008[12]](http://photoshoptutorials.ws/images/stories/b6c33ab10576_146E1/step-00812.png)
![step-008a[12] step-008a[12]](http://photoshoptutorials.ws/images/stories/b6c33ab10576_146E1/step-008a12.png)
![step-008b[12] step-008b[12]](http://photoshoptutorials.ws/images/stories/b6c33ab10576_146E1/step-008b12.png)
![step-008c[12] step-008c[12]](http://photoshoptutorials.ws/images/stories/b6c33ab10576_146E1/step-008c12.png)
![step-008d[12] step-008d[12]](http://photoshoptutorials.ws/images/stories/b6c33ab10576_146E1/step-008d12.png)


0 komentar:
Posting Komentar